
All-Out Guide to Fast Probing
Introduction
Newbies often end up spending ages trying to get their probes to go where they want them and arranging them painstakingly.
With the method discussed in this guide, you will be able to center your probe formation on any signature with two motions. When combined with the keyboard shorcuts available in the new map for resizing the probe bubbles and triggering scans, this can vastly speed up your scanning.
Overview
Probing
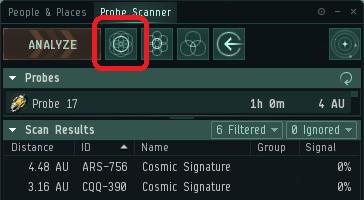
Pick a Signature
-
Filter anomalies out of the probe window by clicking in the list of sigs and pressing the
1key. You don’t need to scan them because you can already warp to them, and they’re just cluttering up the map. -
Launch your probes in the “pinpoint” formation by pressing this button:
-
In the Probe Scanner window, double-click the sig you’re going to scan. This highlights that sig’s red bubble, centers the map view on it, and hides all the other sigs.
-
Zoom out so you can see the whole bubble/circle/pair-of-dots/dot of the sig you’re scanning
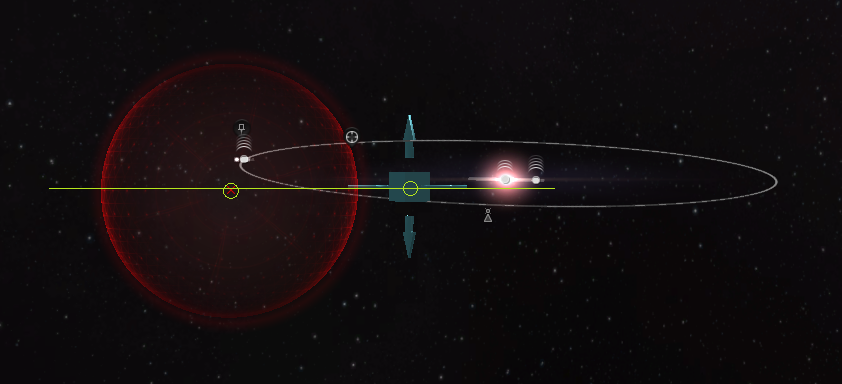
Motion 1
-
Align the camera as close to horizontal as you can (look at the horizontal handles of your probes’ control cube and make them overlap so they are a fine line)
-
Using the up and down handles, align the center of your probe control with an imaginary horizontal line that passes through the center of the signature (the green line below):
Motion 2
-
Align the camera as close to vertical as you can (look at the up and down handles and try to make them as small as you can)
-
Grabbing the square top face of the of the probe control, move your probe control in the horizontal plane so that it’s directly centered on the center of the signature
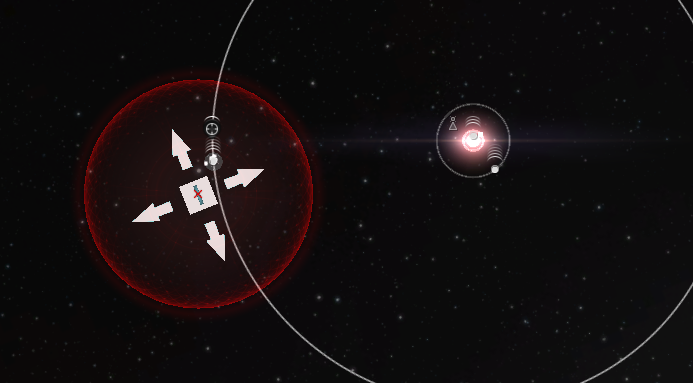
After those two probe movements, the probe formation and the signature are now centered on the same point. If you move the camera around, you can verify this.
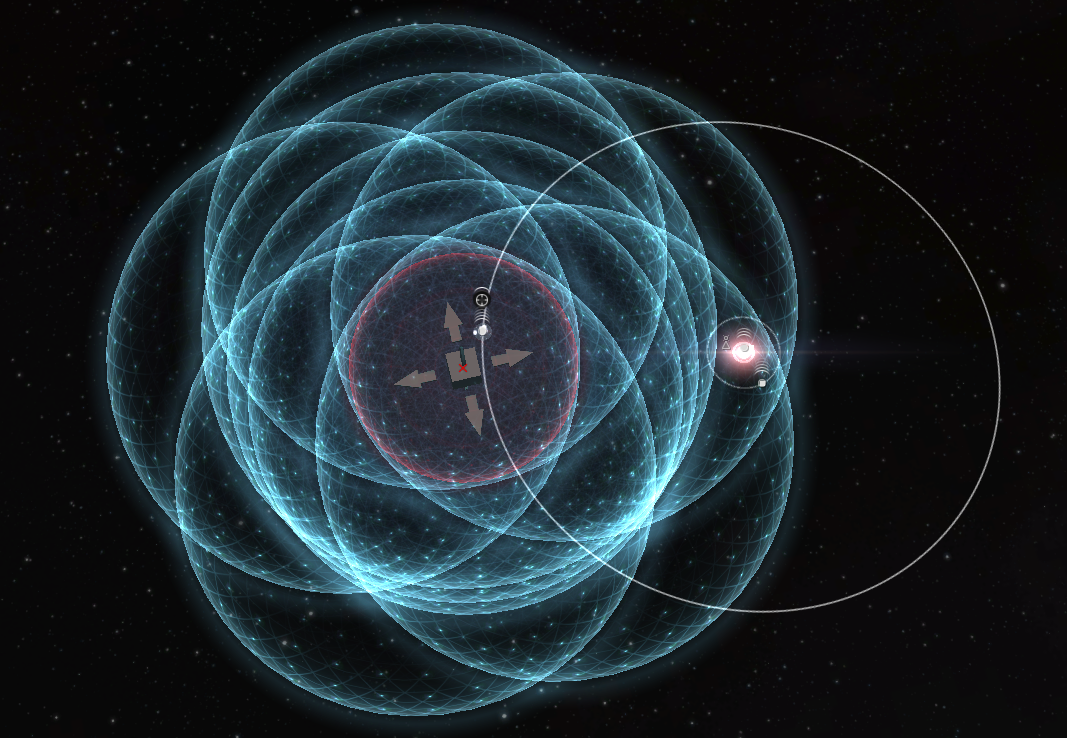
Resizing
-
You should be resizing your probe bubbles with
ALT-Mousewheel. If you aren’t using a mouse, bind the size increase and decrease commands to hotkeys (I usePgUpandPgDn). Either of these are faster than trying to grab the bubbles with your mouse to resize them. -
Resize your probes so that the center portion of the pinpoint formation (the part with the most coverage) matches the size of the signature as closely as possible.
-
Start the scan. You should have this command bound to a hotkey as well (I use
Shift-Space). -
After the scan completes, if the signature isn’t finished yet, double-click the signature in the probe window again to recenter the map on the updated location of the signature. Then repeat the probe centering / scan procedure as before.
-
In the case when the signature isn’t a sphere:
-
Circle: keep the circle inside the center portion of the pinpoint formation while keeping the formation as small as possible, just like for the sphere.
-
Two dots: one of the dots is the real sig, one of the dots is false. Again, make the formation as small as possible while still keeping both dots in the center portion.
-
One dot: reduce the size of your formation at about the same rate you were doing with the others, and recenter as usual. As your scanning skills train, you will be able to reduce your bubble sizes by more notches at a time.
-